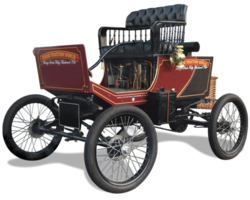
The 1899 Locomobile Steam Car Replica, known as the Lykamobile is a full scale live steam automobile manufactured in 24 kits. This kit is available from a company called "Steam Traction World" located in Daventry, United Kingdom. Each kit is to be manufactured and sent once a month for 24 months. However for cost considerations I have chosen to have my kits batched and dispatched in larger crates to the United States (Topsail Beach, NC).

Specifications:
• Length 7ft 2.6in • Height 5ft 3in • Width 4ft 7.1in • Weight 904 lbs.• Water Tank Capacity 12 Gallons • Fuel Tank Capacity 7.3 Gallons

Construction:

CHASSIS Tubular steel fabrication, combination weld, bolted and silver solder.
STEERING “Ackerman” design tiller steering.
DIFFERENTIAL & DRIVE Spur gear differential similar to the original Locomobile, drive shaft and bearings.
WHEELS & TYRES Single tube pneumatic, treaded.
BREAKING SYSTEM Disc brake system.
ENGINE 21/4" diameter, 3" stroke modified “Hackworth” valve gear.
WATER FEED Twin mechanical pump.
BURNER Fuelled by diesel.
BOILER Multi Fire Tube, fully constructed and complete with necessary paperwork and inspected by notified body.
BODYWORK & SEATS Wooden with steel frame, seating capacity of 2 persons, with turned decorative spindles with leather style upholstery.
Gears: forward and reverse.
Assemble with hand-tools only
Step-by-step instructions
Technical service and help-line backup
Designed on ‘Solidworks’ CAD
Manufactured on modern CNC machines for build accuracy and high quality


Friday, August 16, 2019

Gilmore Car Museum, Hickory Corners, Michigan

I just returned from a visit to the Gilmore Car Museum. If you ever have a chance this is a fantastic place to go for a day. It is situated on a 90-acre historic campus midway between Detroit and Chicago. All of the cars you can walk right up to.  There are nearly 400 vintage automobiles, motorcycles and auto related items. It’s North America’s Largest Auto Museum. Check it out at the following link: Gilmore Car Museum.


Of upmost interest was an 1899 Locomobile that you can walk right up to and take pictures. Touching the cars are prohibited but you can get as close as you want. I took several pictures that I am posting below. Of special interest to me is how the louvers and trim were designed and the front dash.
Details of the trim.


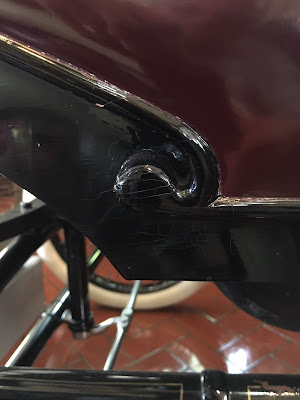
Details of scuff trim to protect body edge.


Front Leather Dash Details.


Notice the three screws that attach the dash to a metal bracket. The metal bracket attaches to the frame below the front floor board.

 Three nuts secure the front dash to each metal bracket.

Details of the pin stripping.

This Locomobile was equipped with a two tone carriage bell and a steam whistle. You can see two foot plungers. The one on the angled floor board next to the brake pedal is for the bell.
The following images shows the bell and a description of the display.

The next few shows the whistle, but it is hard to make out the details. The whistle is horizontal. It is being held by a metal strap. You can see the plumbing going to the front of the whistle.
The below image shows the whistle valve and connecting rod from the floor above. The metal strap with the bolt and nut is holding the whistle.
Finally some images of the Locomobile.


I'm not sure this foot step is original, but it looks nice.
Notice there are two sight glasses. Not sure why. Possibly one is for the water reservoir and the other for the boiler. I don't think the longer one is original from the factory.
And the last image is of the data plate on the back panel.
If you ever get a chance to go to the Gilmore Car Museum you won't be disappointed!

Monday, June 17, 2019

Lyka Kit #17 - Boiler

Kit 17 finally arrived after a misunderstanding with the receiving shipping agent at Charleston, SC (and in case you are wondering what happened to Kit 16, that was a phantom kit considering it was an additional payment for the boiler).  It had been so long since I had an over-the-seas by ship delivery I didn't realize that I was responsible for acquiring a Custom's Agent to guide and clear my shipment through all the red tape. Oh well live and learn....I received the boiler June 13th after sitting in Charleston since May 28th.
All unpacked and with the help of a friend placed on a dolly:
The boiler is way too heavy to manage by myself.  Looking at the boiler there are a few tapped holes for the water and steam that possibly could be used for lifting with an eye bolt mounted into the center tapped hole. I decided that I did not want to chance stripping the threads - again did I mention this thing is really heavy! So I made a cardboard outline of the diameter of the boiler and placed it in the Lykamobile frame to get an idea of the available space and designed my platform accordingly.
I figured I could fabricate a platform that I could use to lift the boiler using a hydraulic engine hoist that I have. So off to our local building supply for some materials. I purchased a 4 foot section of 1"x1" x 16 ga. cold rolled steel tubing and some eye bolts. I cut two pieces at 16 inches of tubing and then cut the remainder into approximately 8 inch pieces and welded it all up and drilled through holes for the eye bolts.
Fits perfectly !
And tested the platform with some nylon straps and the engine hoist. At this time placing the boiler in the frame isn't recommended by Steam Traction World. Additional insulation etc. needs to be done before this step can be taken.
Not that I believe this boiler will ever rust away, I decided it would be good to paint the exterior with POR 15 High Temperature paint. I first used their recommended degreaser and a wire brush and scotch-brite pad to clean the surface.
After letting the boiler dry in the sun for the day, I painted it with the POR 15 High Temperature paint (manifold gray). The paint takes 24 hours to cure before a second coat can be applied which I will do, and the final cure takes place after the boiler reaches 300 degrees Fahrenheit.

This is the Pressure Test Certification document: Certification

Not much else to do until the burner, insulation and fittings etc. arrives.

Wednesday, January 30, 2019

Locomobile Brass Name Plate

Cruising the internet I came upon a listing for "new" Locomobile parts on the Steam Car Network website and I inquired and purchase a replica of the Locomobile Brass Name Plate.
This is a sand mold casting in brass. The originals were also cast, but the details were a little more crisp. I attribute this to the same principle when you make a photocopy of a photocopy. Below is a copy of a Locomobile Brass Plate that was produced when the first Modelworks kits were made by a kit builder.
The detail is pretty good. They did a nice job on it but it is not painted as were the originals. Next are two images showing authentic brass nameplates:
You can see a slight red tinge in the recessed "Locomobile" and the base looks to be painted in semi-gloss or flat black paint. I believe it was at least a semi-gloss, the plates just might be grungy making it appear as a flat black. Below is my finished brass plate. I first used a belt sander to sand the lettering profile and then used a fine file and 200 grit sand paper. I also used a polishing wheel as a final finish. As you can see I couldn't get all of the casting irregularities out, and I did not want to take it down any further. I painted the Locomobile with the same red paint that I used on my chassis. I did use some semi-gloss oil based enamel paint for the background. I think the plate looks pretty decent for being a copy.
All that I need to do is drill two holes for the mounting. I plan to stamp a serial number and Style "2". Hopefully I can use this as my VIN plate for when I get the Lykamobile Registered. As far as the Serial Number I'm thinking about "STW-xxx" to denote Steam Traction World and the actual kit number "xxx" from Steam Traction World.

Monday, January 21, 2019

Lyka Kit #15 Reversing Lever-Parking Brake and Water Pump Bypass

Kit # 15 arrived mid January 2019 while I was away on our annual buying trip to Atlanta for our two retail gift shops here on Topsail Island. The instructions for this kit as a fellow Lyka builder stated to me is "a bit vague to say the least", and he is right. But thanks to Greg, and communication through the internet (and the Apple Empire!) all turned out well.


The first item was to install the reversing shaft bushings to the body frame boss. My bushings had a loose fit, so I used a little bearing sealant to fix them in place.
Next was to attach the Reverser Quadrant Bracket with four M6 Flat Head screws.
After letting my bearing sealant set up for a while, I assembled a thrust washer onto the brake handle and slid the brake handle into the boss.
Next was to assemble the Inner Brake Lever with a small key and fix this with a set screw. I had to adjust the depth of the keyway on the Inner Brake Lever due to a slight interference fit for these parts to slide together. I didn't want to force the parts together because I need to disassemble everything for final painting and finish.
Now the Reverser Lever is passed through the Brake Lever towards the Engine Support Frame and through the two bushing brackets.
Here we encounter my first fitting issue. As I have mentioned in a previous posting, the engine support frame is made from structural steel tubing. The tubing is not the best solution to rely upon for dimensional integrity. In the process of rolling the tubing into its rectangular shape at the steel manufacturing plant, there are inherent artifacts in that process that don't allow for nice square, parallel structure. Below you will see that the Reverser shaft is not parallel with the cross member frame. I took one measurement close to the Boss.
And then another measurement close to the brackets and as you can see below there is a significant difference -- about 0.080 inches (2mm).
Next I decided to unbolt the middle bracket from the engine support frame to see its alignment of the shaft through the remaining bracket.
Now the Reverser shaft measured parallel to the frame. So the issue mostly at this point is the middle bracket. A little "rat-tail" filing was in order.
Now comes my first encounter with the vagueness of the instructions. The instructions state to place the reverser lever between the two brackets with "a" 2mm washer (LK1475) on either side of the component. I did this and something didn't look right, too much slop!
At this point I consult Greg (fellow Lyka builder from France) because I know he had already completed Kit 15. He informed me that I was missing a few parts and set me straight. The assembly directions should have also instructed to use another 2mm washer LK1476 that has a slightly larger Outside Diameter (one is 30mm the other 32mm). The Reverser Lever actually has a 30mm side and a 32mm side diameter therefore matching washers. Also at this point I true up the engine support tube to make the brackets perpendicular and parallel to each other by filing the tube's rolled edge some.
Then the Bypass Rod Support Bushing is inserted into the Reverser Lever Shaft. I had to take about 0.001 inch off the diameter to get the bushing to a slide fit -- again I didn't want to force the fit.
Now I mount the brass reverser quadrant to the reverser bracket.
Next was to install the Reverser Rod Bypass Handle to the rod. I first try 15mm and test fit.
But I end up doing about 12mm.
And I used medium strength thread locker for the final assembly of the Bypass Handle to the rod.
This is now placed into the Reversing Lever Shaft and set with two M6 nuts (I had to use regular M6 nuts because my shipment of parts didn't have the half nuts (jam nuts) that were supposed to be sent. I will correct this in my final assembly with Stainless Steel hardware.
At this point I notice that the Parking Brake Lever will not fully seat into the brass quadrant. This will have to be corrected with a little filing of the lever in this area. When manufacturing and bending the lever to its specification, the steel actually deforms a little in this process which is easily fixed.
Onto mounting the ball valve and mounting bracket.
Another M6 nut is placed on the rod and a mating part that slides onto the ball valve stem and threaded to the rod is used. This part is referred to as the Bypass Actuator (LK1441N).
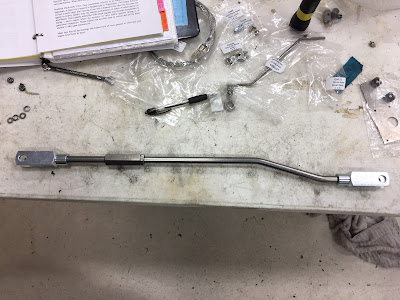
Now our instructions say to assemble the Reversing Rod that mounts to the Reversing Actuator and the Engine. It consists of two clevis', two threaded rods, a turn buckle or threaded adjuster and two M12 jam nuts (one left hand thread). The kit supplied regular M12 nuts, but I swapped them for some half nuts that I had.
The instruction says to loosen the engine reversing arm's set screws and rotate the arm so that the clevis can be installed. I chose not to do this at this time because I'm going to paint the assembly black. I did mount it to the reversing lever actuator for fit and slid the engine clevis over the engine reversing actuator as a test fit.
Valve Timing instructions were given in this kit, however Steam Traction World did not provide any means to hook up the engine by means of a manifold for compressed air as instructed for testing purposes. I skipped over this part and await parts in a subsequent kit before attempting to time the valves. Next the kit provided some of the parts for the lubrication system - again the instructions say to assemble and mount the lubricator, but no lubricator was supplied -- again this will follow in a subsequent kit. But the brackets and rod are mounted! (temporarily)
Finally this kit provided the cabling and parts for the Parking Brake.
First is to assemble the cable to the differential brake pad.
Then to route the cable through the pulleys. Here I find a design issue with the placement of one of the spacers for the middle pulley bracket. I removed this one spacer and bolt to allow the cable to pass through this bracket unimpeded.
But you will notice that the cable still rubs against the upper part of the bracket.

Also I notice on the smaller brake pulley that is mounted to the side frame that it too was rubbing the cable.
Therefore grinding, filing, tapping a new M8 into the middle bracket for the third spacer will solve these issues.
And a few final images of the brake cable assembled.
Now it is time to take all of this apart and paint everything that needs to be protected and reassemble. The next Kit 16 is another Boiler payment followed by Kit 17 the Boiler, so we think. I know Steam Traction World is busy welding the boilers, so hopefully it won't be too much longer before Kit 17 is ready for shipment.
Popular Posts