The 1899 Locomobile Steam Car Replica, known as the Lykamobile is a full scale live steam automobile manufactured in 24 kits. This kit is available from a company called "Steam Traction World" located in Daventry, United Kingdom. Each kit is to be manufactured and sent once a month for 24 months. However for cost considerations I have chosen to have my kits batched and dispatched in larger crates to the United States (Topsail Beach, NC).

Specifications:
• Length 7ft 2.6in • Height 5ft 3in • Width 4ft 7.1in • Weight 904 lbs.• Water Tank Capacity 12 Gallons • Fuel Tank Capacity 7.3 Gallons

Construction:

CHASSIS Tubular steel fabrication, combination weld, bolted and silver solder.
STEERING “Ackerman” design tiller steering.
DIFFERENTIAL & DRIVE Spur gear differential similar to the original Locomobile, drive shaft and bearings.
WHEELS & TYRES Single tube pneumatic, treaded.
BREAKING SYSTEM Disc brake system.
ENGINE 21/4" diameter, 3" stroke modified “Hackworth” valve gear.
WATER FEED Twin mechanical pump.
BURNER Fuelled by diesel.
BOILER Multi Fire Tube, fully constructed and complete with necessary paperwork and inspected by notified body.
BODYWORK & SEATS Wooden with steel frame, seating capacity of 2 persons, with turned decorative spindles with leather style upholstery.
Gears: forward and reverse.
Assemble with hand-tools only
Step-by-step instructions
Technical service and help-line backup
Designed on ‘Solidworks’ CAD
Manufactured on modern CNC machines for build accuracy and high quality


Wednesday, July 29, 2020

Leather Dash & Floor Boards

In Kit 19 Steam Traction World provided a wood dash that was to be outfitted with some trim pieces etc to simulate the Locomobile's typical leather dash. I had noticed that in one of the Production Updates late last year, they had made a prototype of the wire frame that would be covered with leather like was done "back in the day". So I enquired to Steam Traction World (Dean) if I could purchase this prototype. Well Dean sent it to me gratis because they were not going to use it. Below is the frame pictured in the production updates that was sent to me.
The wireframe is close to what was the original design, but I could modify it to bring is even closer. The two inside rods should actually be about 3 inches away from the outer frame. So I cut these rods out and re-welded them in the more original place. The next two images shows the before and after of the relocation of the rods.
Before
After 
Now I have to say, that during this whole process many times I thought to myself, did I chew off more that I should have. I have never tried to stitch anything -- Let alone leather! Where to start, where to get supplies etc. etc. Well with the Covid-19 pandemic, the closest leather craft shop to me (about 2.5 hours away) was closed indefinitely. So I resorted to the internet and spent a great deal of time searching and educating myself on what to do. I finally found on eBay a supplier of some nice "shiny" 4 to 5 ounce leather (1.6 to 1.8 mm thick). From this I decided to make a recessed template that I could use to start to form the leather around the wireframe.


I placed the leather on the wood template and then the wireframe and weighted the frame down to depress the leather into the recess. I let this stand for several days after which I then traced the wireframe outline into the back of the piece of leather.

I'm not sure that I really needed to make the recessed wooded template, I think I could have just traced the outline without making the leather depressions of the frame. From this outline I again score parallel lines spaced about 15 mm from the centerline of the depressions.
These lines will be my guide to stamping/pounding stitching holes into the leather. Pounding holes into the leather is necessary due to the toughness of the leather. The leather crafters have devised all sorts of specialized tools to do this -- As shown below.
The use of a sheet of rubber is really required to prevent dulling and bending the multi-pronged tool. A two pronged tool is used to go about the radius' and a single pronged tool to space the last few holes if required on a stitch line at the end to blend the spacing. Once I had pounded out all of the stitching holes on front piece of leather, I needed to pound out the second back piece of leather. Therefore I needed to stitch the two pieces together so that I could maintain alignment between the two pieces of leather.
The needle is actually very dull and stout, the thread is Ritza 25 Tiger Thread 1.4mm Wax Braided Polyester impregnated to repel water.

Once stitched in four places around the perimeter I used the previously punched holes to guide the punching tool to punch the second piece of leather. Now I have two pieces of leather punched and the stitching onto the wireframe can commence. First I had to slice two places to insert the mounting flange through the back piece of leather.


Then I place the front piece of leather over the frame and align the stitching holes and begin the stitching.
I stitched the whole outside perimeter and mounted the dash to see if everything looked correct.
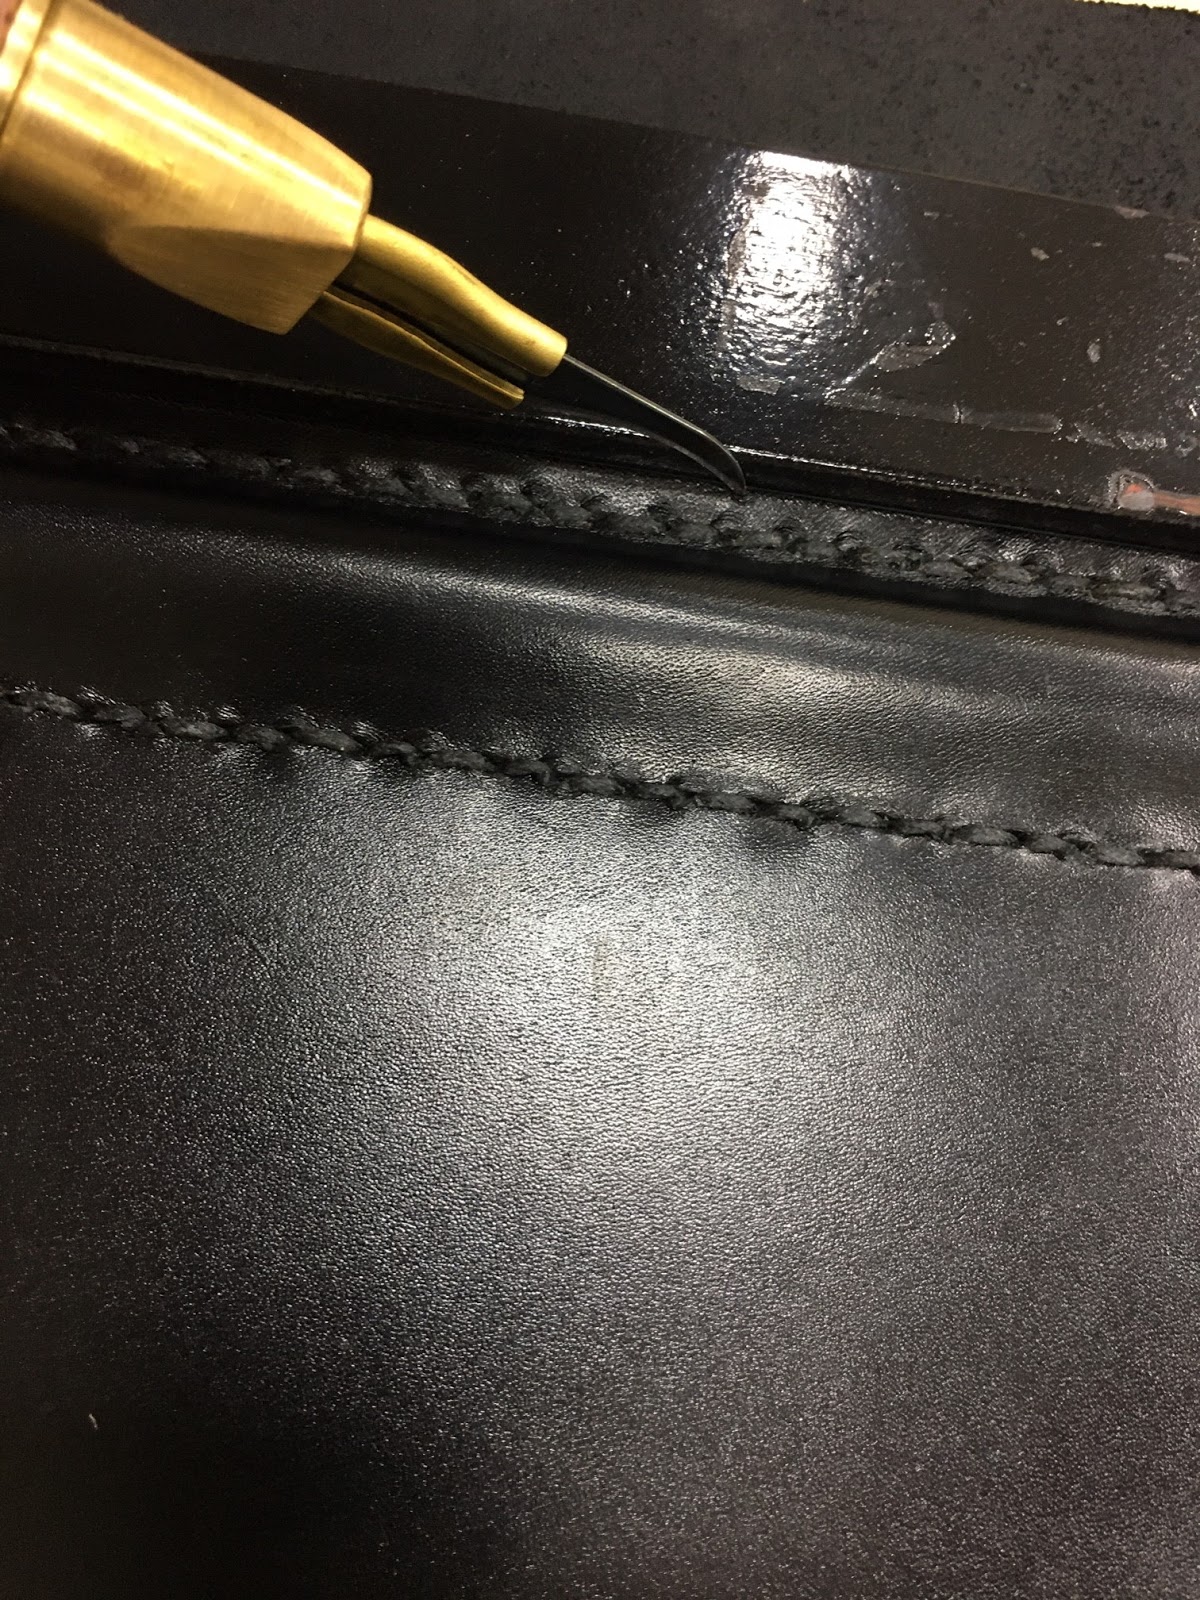
I kept the frame mounted to stitch the remaining lines because it was a lot easier having it upright. The process was to stitch the interior lines closest to the outside and work my way to the middle. This way I reasoned the leather would stretch in an even manner. The next image shows all of the wireframe stitched.
Now I remove the dash and trim the leather. Typically "real" leather craftsmen cut the outside edges before stitching. I was too hesitant to do this just in case I needed to make some adjustments.

The metal flat stock bar used as the straight edge will be placed in the next image in the leather as a stiffener for the lower flap.
Once this is stitched in I trim the last pieces and mount everything onto the Lykamobile.

The last thing to figure out is how to burnish the trimmed edges. Supposedly you take a special leather burnishing compound and rub the edges until the leather heats up and seals. I decided to take a break. It took three days of hand stitching of the leather and let me tell you, your fingers and hands get quite sore. All in all, once I got started, this was a weeks worth of effort.

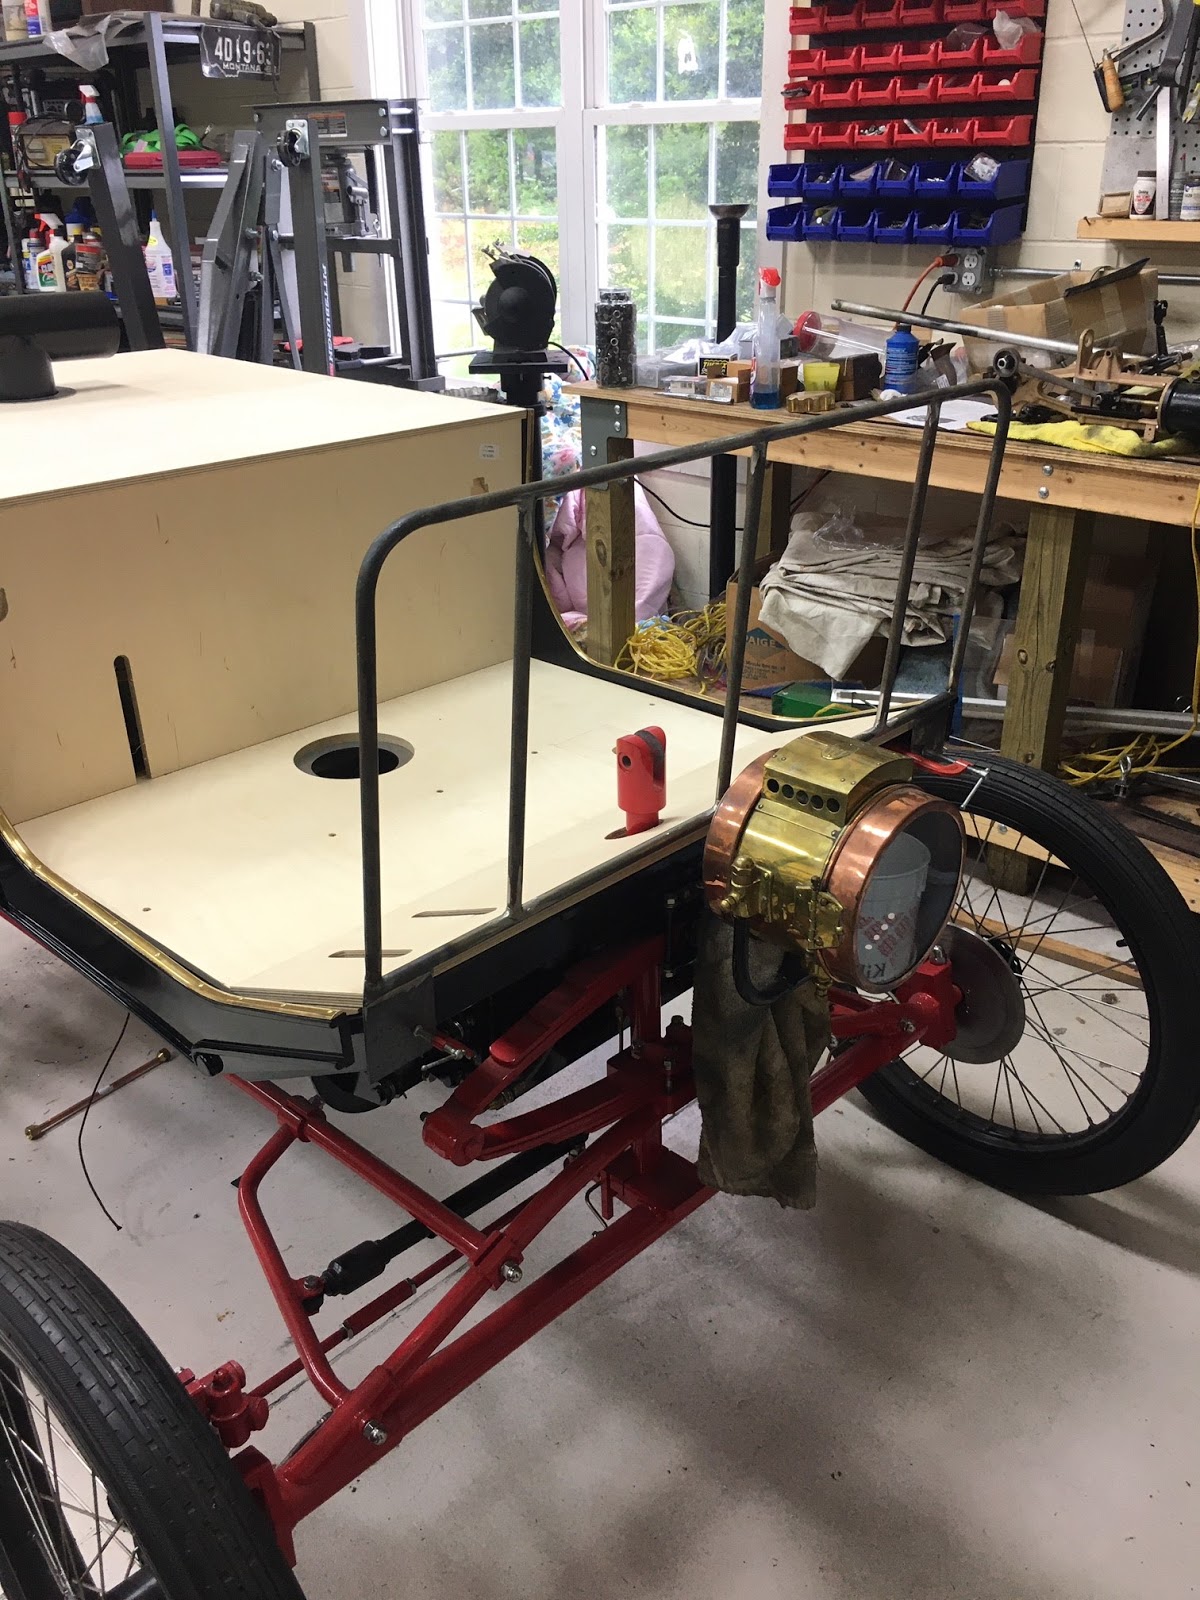
Now on to the floorboards. I decided to purchase some diamond patterned rubber to glue to the floor boards. Its a pretty simple process. Just get some contact cement and coat the floorboards and the underside of the rubber pieces, let it set up for about 30 minutes, then squeeze the two together. I placed some weight on the pieces and let them cure overnight and then trimmed up the sides. Also in the last few pictures you will see the "Locomobile" nameplate mounted on the engine panel below the seat.


The final trimming for the pedals and fuel access will happen when I receive the necessary parts to complete this task. Only two kits to go and the penultimate kit (second to last - Kit #21) got lost in Memphis, Tennessee (FedEx) going on 4 weeks now. So I don't know when I'll get that kit -- if ever! But Steam Traction World is on top of it and I will be taken care of.

Wednesday, July 1, 2020

Lyka Kit #23 Bodywork Panels Part 2

I decided to send out the rear backrest metal part to be powder coated paint in gloss black, at the same time I sent out a few of the brackets too. Below the lids for the oiler reservoirs that were powder coated are now assembled and ready to be installed on the engine. I will install these once I get the pressure side of the plumbing for the engine which hopefully will be in the next kit.

The base for the water gauge was powder coated black too, I also buffed the brass cover before assembly. The assembly is pretty straight forward as shown below.


Next was to install the stainless steel 90 degree elbow fittings to the gauge. I put it in my vise using my plastic jaw covers and some paper towels to prevent scratching the surfaces. The centerline to centerline for the elbows need to be about 180 to 181 mm. This depends on your side panel hole locations.
Next I install hopefully for the last time the water tanks and the two side panels to the frame.

Now it is time to install the water level sight glass gauge. First the special pipe fittings are loosely installed through the side panel.
Remember 180 mm dimension to align the pipes to the gauge. I also placed a stainless steel washer facing the side panel to prevent marring the paint.
I used a deep well 22mm socket to screw in the special pipe fitting into the water gauge from inside the frame, once this was tight, then a 22mm open end wrench to tighten the jam nuts. Notice I placed a stainless steel washer against the side panel to prevent marring of the paint.


Now onto the seat. First I need to place the wood strips on the underside of the seat cushion. The wood strips will locate the seat cushion securely on the wood frame. I place the seat on its side to layout where I want the strips of wood. The strips of wood were drilled and count sunk for the wood screws.

I predrilled the holes into the bottom of the seat cushion, being careful not to drill completely through the wood. I placed the strips 24 inches apart.
Next fitting the metal backrest to the top of the seat. I used some wood clamps to temporarily locate the metal part. This allowed me to make little adjustments in its placement before pre-drilling the screw holes into the rail.

All screwed down.
Next the placement of the cushion on the back rest. I centered the cushion and screwed into place the cushion and then worked my way out side to side. The curvature of the cushion would then have a better chance of laying flat against the metal part in this manner. The screws that Steam Traction World were steel, and would probably rust in short order, so I replaced them with brass round head slotted screws with brass washers to protect the paint.

Below are pictures of everything installed, except for the dash. I am also going to glue diamond patterned rubber matting to the floor boards, but I will wait until we receive the brass pedal surrounds for the floor boards before proceeding.


Getting very close now, hopefully the two remaining kits will be dispatch soon. 

Popular Posts