
I did NOT follow Steam Traction World's recommended lengths. I did cut the first rear wheel brake line per their recommendation at 160 mm, but when I tried to install the line on the left rear disc brake it was too long and would rub the paint on the rear axle tube. Not to worry, I tried the brake line on the right rear wheel and it fit perfectly. I believe that the bulkheads on the axle tube are located slightly differently. The following shows the steps for making a brake line.

I used a painter's stirrer stick to press the ferrule fully onto the plastic tube.


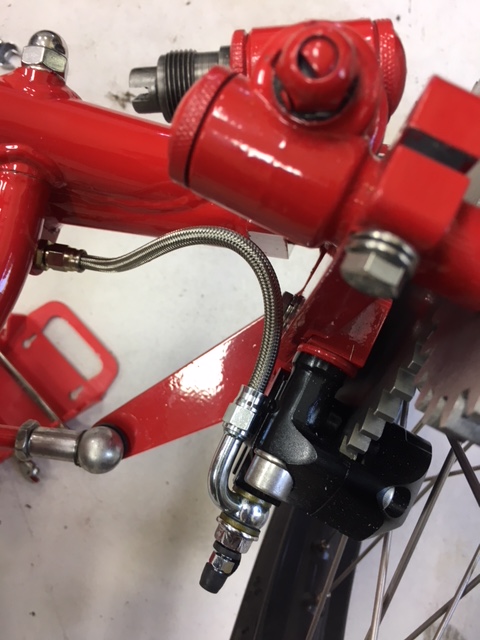
Final assembly on the right rear disc brake.

For the left rear disc brake I shortened the brake line just a little - maybe 4 mm and it cleared the rear axle tube.
Next I fitted and fabricated the rear brake line that goes from the right chassis frame to the brass "T" on the rear axle tube. You must first install a bracket utilizing two of the bolts that attaches the chassis to the springs. You will notice that I twisted the bracket slightly towards the front to better align with the brass "T". Steam Traction World suggested this brake line be 300 mm, mine was shorter than that, but unfortunately I didn't write down the length.

I did try and manipulate the rigid brake pipe to be in the middle of the chassis opening and to also have clearance of the brake line inside the chassis to maybe eliminate rubbing of the line against the internal chassis tubular steel frame.

Next I fitted and fabricated the front static flexible brake line from the battery box bulkhead to the steering column bulkhead. Steam Traction World suggested this brake line be 250 mm. Mine fit nicely at 230 mm long.

So after all of the static flexible lines installed, I had 355 mm left - that leaves me with about 177 mm each to finish the front steering brakes. I started on the right steering spindle and determined that I needed about 172 mm.
The wheel turned to full left.

The wheel mostly straight.

The wheel turned to full right.
The left wheel I determined that I needed about 165 mm to assure that the brake lining would not rub on any of the painted areas. This side was a little tight, but I was able to still get the full range of steering. Time will tell if it is too tight. The brake line looks a little stressed in the full right position, but actually it looks worse than it is in reality.
The wheel turned to full left.

The wheel mostly straight.

The wheel turned to full right.

And this is all the of the flexible brake line that I had left !

Now it is time to paint the brackets etc. for final assembly (including the parking brake parts) - so a little disassembly before Kit 11 can be fully finished.


Thanks for sharing - you are now ahead of me, so I can follow your tips and pics. I am admiring your painting skills, with the idea that I might get somewhere close. It seems that you have had similar experiences to mine with FedEx.
ReplyDeleteThank You Alan. Just a note about this posting...it appears that I had my "left's" and "right's" all mixed up. I have corrected this now.
ReplyDelete