

The first step was to check that the rings would compress enough to slide into the cylinder hole. I found that two of the four did and the other two did not fit into the first cylinder. I tested the fit of the two non-fitting rings in the other cylinder and they did fit -- so all good. Next I had to expand the rings ever so slightly and slide the rings over the aluminum piston into the grooves.

I then attempted to slide the piston with the rings into the cylinder.

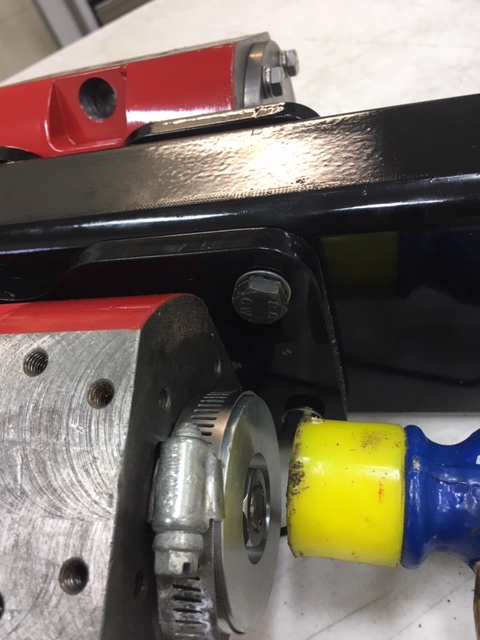
I couldn't quite compress the rings enough by hand, so luckily I had an old hose clamp that I employed for this task.


And gently tapping the piston into the cylinder.
I used a small 19mm socket wrench set up to thread the piston assembly back together.

The next step was to seal the piston covers to the cylinders using Foliac Graphite and Manganese High Pressure Sealant.

The instructions state to apply the sealant with a brush to both sides and to assemble the parts within 5 minutes.


Next I disassembled the lower cylinder cap for applying the Foliac Steam Sealant. Normally if we had the piston rings to begin with (instead of being delivered with Kit #14), this would have been done with the first assembly of these parts. But no worries -- all good and fun!

I repeated all sealing steps for the top and rear cylinder caps to finish Kit #13 Engine.

In the next few days I will be assembling Kit #14 the final parts for the engine. To date I have deburred and painted the components that I believed needed to be painted.


I know your not at the boiler build yet but when you do, build a super heater for it it will reduce water usage. I'm doing it now if you want to read about it go to this forum a lot of info that will help. https://steamautomobile.com:8443/ForuM/read.php?1,27985
ReplyDeleteAlso look up cylinder drains on the lika yahoo groups there are needed.
ReplyDelete