


All joints were glued with indoor/outdoor wood glue. I chose a brand available at our local Lowes Building Supply store. It is called Titebond III Ultimate.

I secure the pieces with some furniture pipe clamps and corrugated cardboard to guard against accidentally marring the wood seat base sides. Any excess glue is wiped off with a damp cloth.

Next is to dry fit all of the seat spindles. I quickly discover that one end of the seat spindles are a bit bigger and will not fit into the seat base or armrest. So I carefully use my belt sander to rotate the spindle and sand away the diameter a little bit at a time and keeping the contour or slope correct by eye, testing the fit as I go until satisfied. I repeat this 22 times!

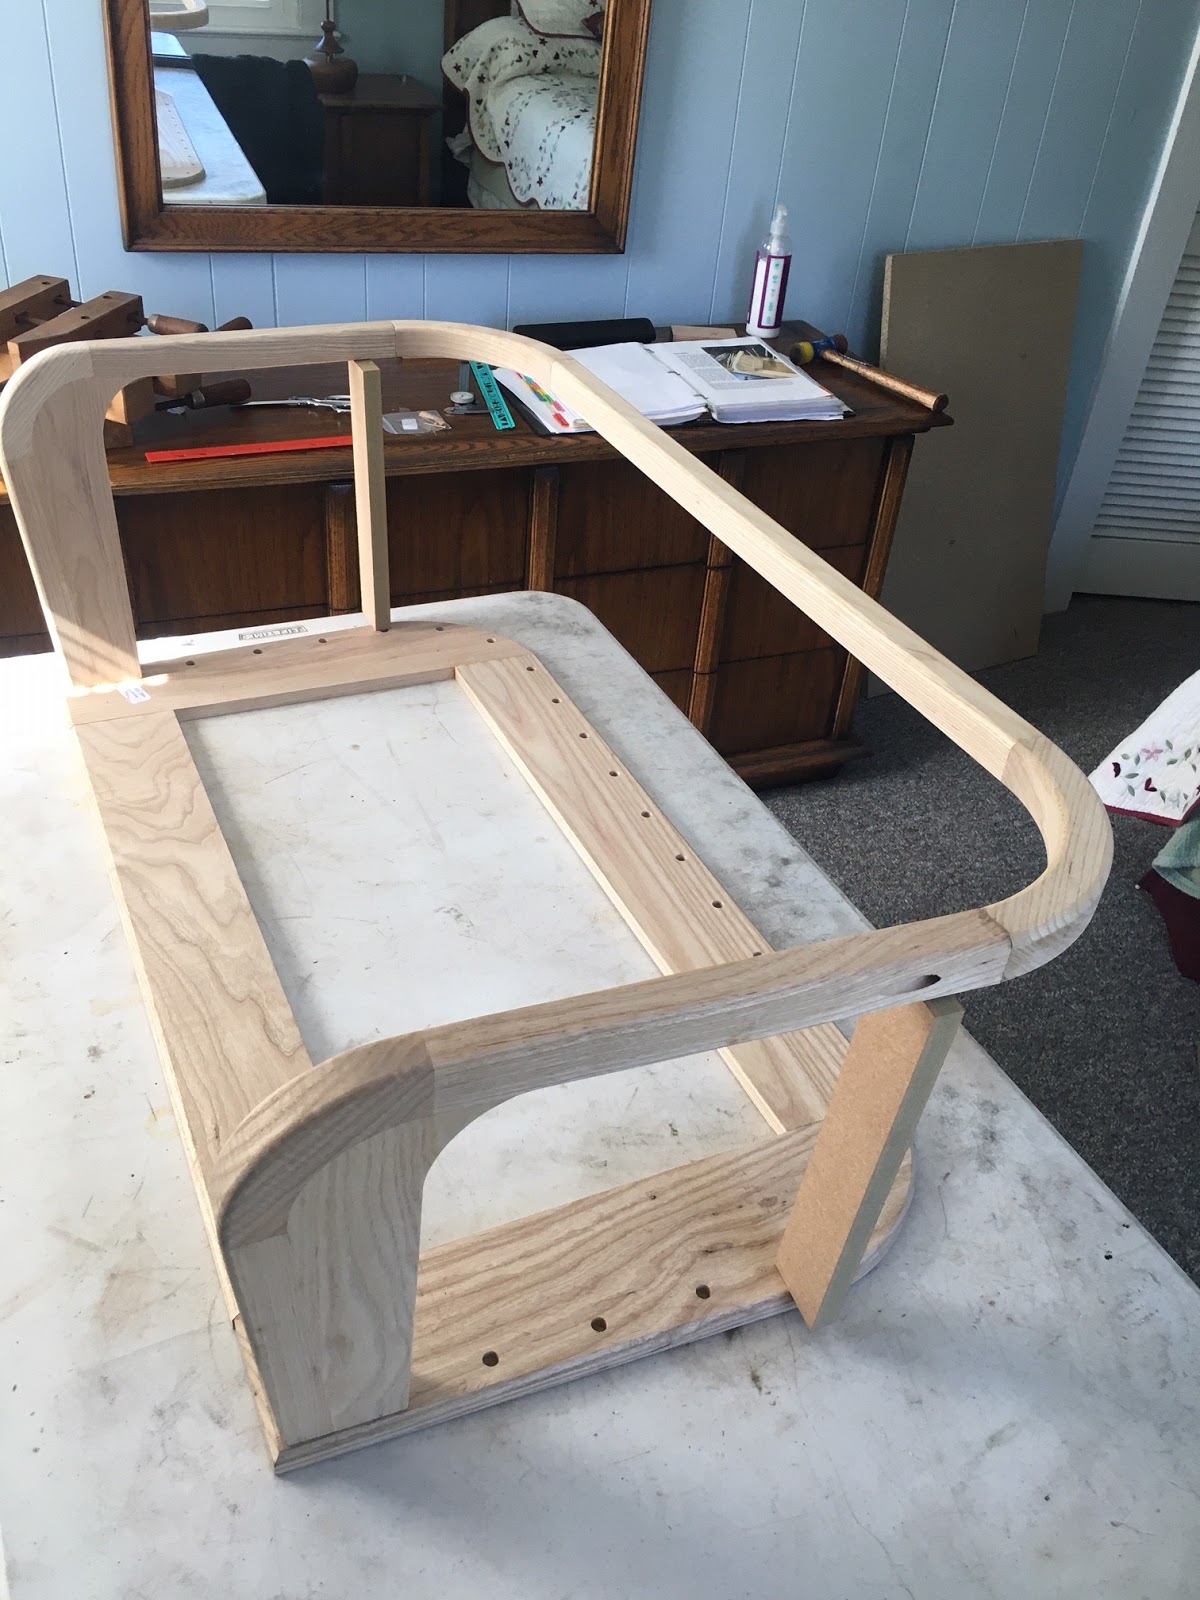
Next to dry fit as many of the components as possible. This turns out to be a "whack-a-mole" exercise. Just as you get a few spindles seated, and try a few more the previous spindle pop out! However eventually with experience you learn how to control all those spindles.


As you can see the armrest has not been glued together yet. I wanted to test the dry assembly before gluing anything. Below I have aligned the armrest pieces and am satisfied that they will be correct once glued.

Steam Traction World suggests that you glue the armrest together before wood screwing the pieces together. I could only do one side at a time, so this took two days to accomplish. This is a butt assembly and I used some other wood clamps to secure the pieces butted together with glue.


Once the glue has cured (24 hours each side) I dry fit the armrest again. Steam Traction World supplied some test wood pieces that are cut to the proper spacing that the armrest should be to the seat base. All looks good to go.
After much thought about how to paint this beast, I decided that I would paint all the pieces individually, masking off the places where the glue goes to assure wood to wood gluing. I figured I could obtain a better finished result by spray painting the pieces individually and then assembling versus brush painting the whole seat assembled looking for drips and runs from the brush. Time will tell if I made the right decision! So the first thing I need is a set up to paint the 22 spindles. I created a fixture from lumber (again from Lowes Building Supply store) that would space out the spindles and allow me to rotate the spindles for complete painting coverage.

As you can see I have masked off each end with painter's tape to the depth that the spindle goes into the seat base or armrest. Any areas that happen to be exposed once assembled I will touch up with a small art brush and paint. I sprayed two coats of primer (12 hours drying time each - so two days to accomplish this).


Then I allowed this to dry another 24 hours before spray painting all of them black.


I will let these dry for a few days. I plan on painting the center knob red to match my chassis color. I have ordered a variety pack of small sizes of angled paint brushes - about $10 from Amazon.com. While I wait for the brushes, the paint has to cure anyway. Next I return to the armrest to assemble the wood screws to secure the glued butted pieces. Steam Traction World suggest that you drill a pilot hole for the screw. The wood is a hardwood, and the last thing you would want is to have the would split from screwing the screw into the armrest or the screw to shear off. Unfortunately I don't have a long enough and small enough drill bit to do this. So once again Amazon.com comes to the rescue - none of my local resources had the drill bit. The drill bit is 1/16 inch diameter by 6 inches long.

I figured out how far I need to drill into the armrest and mark this off with painter's tape. Because the wood is hard you must clear the bit a few times as you go.

Once the blue tape reaches the edge of the slotted opening I will be at the proper depth. Next I screw the wood screw into the armrest. All of this is repeated for the other side.

And the final finishing touch is to glue the wooden plug into the armrest to hide the screw.


And wipe the excess glue off and let it all cure.

In my next posting I will cover the sanding and finishing of the seat bottom and armrest, I expect that I will have to fill in a few places with wood filler and sand this smooth, then prime all the pieces and paint them black. Then once the spindles are painted with the red, I can assemble and glue everything together. Stay Tuned!


No comments:
Post a Comment